

搬运自我的obsidian知识库,资深软粉现在基本快要放弃 Windows了,所以搬过来记录一下吧,我使用了原编写日期来发布
基于个人环境编写,基于笔记本rtx2070、cuda11.6、win10系统,由于上个假期重新安装系统直接安装了python3.11版本太高了没有匹配所有硬件的pytorch版本,只能用anaconda了,下面记录一下配置流程、问题解决和一些常用指令记录;令,貌似我的显卡最多支持不到cuda11.7以上的版本,所以pytorch2恐怕无法安装了
前期准备与可选项
- cpu版本pytorch安装(我的surface在使用)
conda config --add channels https://mirrors.tuna.tsinghua.edu.cn/anaconda/pkgs/free/
conda config --add channels https://mirrors.tuna.tsinghua.edu.cn/anaconda/pkgs/main/
conda config --set show_channel_urls yes
conda config --add channels https://mirrors.tuna.tsinghua.edu.cn/anaconda/cloud/pytorch/
官网指令
pip3 install torch torchvision torchaudio
2.  查看本机cuda版本
    1.  cmd指令
    ```python
    nvidia-smi
2. 右键Nvidia显示面板 系统信息->组件- 安装anaconda前貌似需要卸载本机python,我没有卸载,目前没有遇到问题
anaconda安装
一个要点:环境变量配置(系统变量->PATH)
D:\anaconda
D:\anaconda\Scripts\
D:\anaconda\Library\bin
D:\anaconda\Library\mingw-w64\bin
pytorch环境配置
- 清华下载源配置
# 设置清华镜像(cmd命令行输入执行)
conda config --add channels https://mirrors.tuna.tsinghua.edu.cn/anaconda/pkgs/free/
conda config --add channels https://mirrors.tuna.tsinghua.edu.cn/anaconda/pkgs/main/
conda config --add channels https://mirrors.tuna.tsinghua.edu.cn/anaconda/cloud/conda-forge/
conda config --add channels https://mirrors.tuna.tsinghua.edu.cn/anaconda/cloud/bioconda/
修改user/<用户名>/.condarc
channels:
- http://mirrors.tuna.tsinghua.edu.cn/anaconda/cloud/pytorch/
- http://mirrors.tuna.tsinghua.edu.cn/anaconda/pkgs/main/
- http://mirrors.tuna.tsinghua.edu.cn/anaconda/pkgs/free/
show_channel_urls: true
ssl_verify: true
- 新环境创建,期间安装pytorch时solve卡了大半天,以为是配置出错,实际上等就行了。
conda create -n env_name python=3.9  # 创建一个名为env_name,版本为3.7的python虚拟环境
conda activate env_name
conda install pytorch==1.13.1 torchvision==0.14.1 torchaudio==0.13.1 pytorch-cuda=11.6 -c pytorch -c nvidia
pytorch-GPU测试代码
务必确保在conda虚拟环境下运行(激活环境后prompt或cmd中输入code或使用notebook)
import torch
flag = torch.cuda.is_available()
print(flag)

ngpu= 1
# Decide which device we want to run on
device = torch.device("cuda:0" if (torch.cuda.is_available() and ngpu > 0) else "cpu")
print(device)
print(torch.cuda.get_device_name(0))
print(torch.rand(3,3).cuda())

# output
True
cuda:0
GeForce GTX 1080
tensor([[0.9530, 0.4746, 0.9819],
        [0.7192, 0.9427, 0.6768],
        [0.8594, 0.9490, 0.6551]], device='cuda:0')
import torch
import time
from torch import autograd
#GPU加速
print(torch.__version__)
print(torch.cuda.is_available())

a=torch.randn(10000,1000)
b=torch.randn(1000,10000)
print(a)
print(b)
t0=time.time()
c=torch.matmul(a,b)
t1=time.time()

print(a.device,t1-t0,c.norm(2))

device=torch.device('cuda')
print(device)
a=a.to(device)
b=b.to(device)

t0=time.time()
c=torch.matmul(a,b)
t2=time.time()
print(a.device,t2-t0,c.norm(2))

t0=time.time()
c=torch.matmul(a,b)
t2=time.time()

print(a.device,t2-t0,c.norm(2))
output : 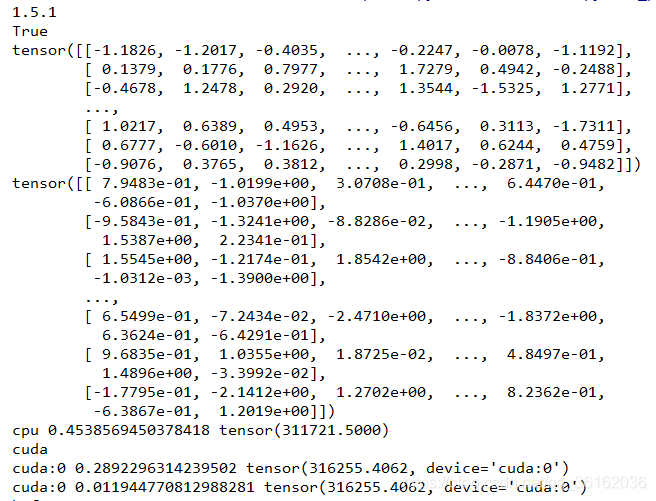
安装第三方库的方法
win10用anaconda配置gym教程+避坑anaconda安装gym、Tsukuyomi的博客-CSDN博客
Anaconda 安装python第三方库的各类方法_anaconda安装第三方包__Ashore的博客-CSDN博客
【强化学习】Win10使用anaconda安装Gym环境并运行你的第一个强化学习程序“Hello world”_kikook的博客-CSDN博客
报错解决
解决Anaconda3 solving environment 巨慢的方法_CHEN7_98的博客-CSDN博客
【Pytorch的坑】OSError: [WinError 126] 找不到指定的模块caffe2_detectron_ops_gpu.dll” or one of its dependencies_榴莲味的电池的博客-CSDN博客
conda常用指令记录
GPU相关:
import  torch
#返回当前设备索引
torch.cuda.current_device()
#返回GPU的数量
torch.cuda.device_count()
#返回gpu名字,设备索引默认从0开始
torch.cuda.get_device_name(0)
#cuda是否可用
torch.cuda.is_available()
# pytorch 查看cuda 版本
# 由于pytorch的whl 安装包名字都一样,所以我们很难区分到底是基于cuda 的哪个版本。
print(torch.version.cuda)

# 判断pytorch是否支持GPU加速
print (torch.cuda.is_available())

# 【PyTorch】查看自己的电脑是否已经准备好GPU加速(CUDA)
# 那么在CUDA已经准备好的电脑上,会输出:cuda:0
# 而在没有CUDA的电脑上则输出:cpu
device = torch.device("cuda:0" if torch.cuda.is_available() else "cpu")
print(device)
虚拟环境相关:
# 环境管理
conda env list
conda info -e
conda create -n (虚拟环境名) python=(python的版本)
conda activate  (虚拟环境名)
conda deactivate
conda create -n (新虚拟环境名) --clone (旧虚拟环境名)
conda remove –n (虚拟环境名) ––all
# 包管理
conda list
conda install (包名)
conda install (包名)=(版本)
conda remove (包名)
conda update (包名)
conda search (包名)
较为详细
Anaconda conda常用命令:从入门到精通_anaconda命令_笨牛慢耕的博客-CSDN博客
Mac Pro M1测试PyTorch GPU - 掘金 (juejin.cn)
补充一段,macos测试代码:
import torch

torch.__version__

print (f"{torch.backends.mps.is_available(), torch.backends.mps.is_built()}")

a = torch.rand(5).to("mps")

print (a)
Comments NOTHING